


Introduction
In modern web development, security is paramount, especially when it comes to protecting sensitive data or functionality behind authentication barriers. Next.js 13, a popular React framework, combined with Appwrite, a self-hosted backend as a service platform, offers a powerful solution for building secure web applications. In this blog post, we will explore how to protect your private routes in Next.js 13 using Appwrite authentication. By implementing this approach, you can ensure that your private routes remain inaccessible to unauthenticated users, enhancing the overall security of your application. Let's dive in!
Understand Next.js and Appwrite
Before diving into the details, let's take a higher-order look at what Next.js and Appwrite are. Next.js 13 is a powerful React framework that provides server-side rendering, static site generation, and other advanced features for building fast and scalable web applications. On the other hand, Appwrite is a backend as a service platform that simplifies common backend tasks, including user authentication, database management, and file storage. The combination of Next.js 13 and Appwrite empowers developers to create secure applications with ease.
Setting up Next.js and Appwrite
To begin, we need to set up a Next.js 13 project and integrate Appwrite into it. This involves creating a new Next.js project and configuring the Appwrite SDK. By establishing this connection, we can leverage the all capabilities of Appwrite in our Next.js application.
npx create-next-app <appname>
After running this command. Make sure your app is created and then change your directory to your app with:
cd <appname>
Now, let's install the Appwrite SDK by running the following command. (You can use yarn or pnpm or any of your choice)
npm install appwrite
With that setup, now we can move on to the next part of configuring appwrite into our Next.js application. Open your code editor 🧑💻🧑💻!!!
Configuring Appwrite with Next.js
Now that we have appwrite in our app, it's time for us to use it with the best potential. Here is a folder structure I like, to manage appwrite services I'm using.
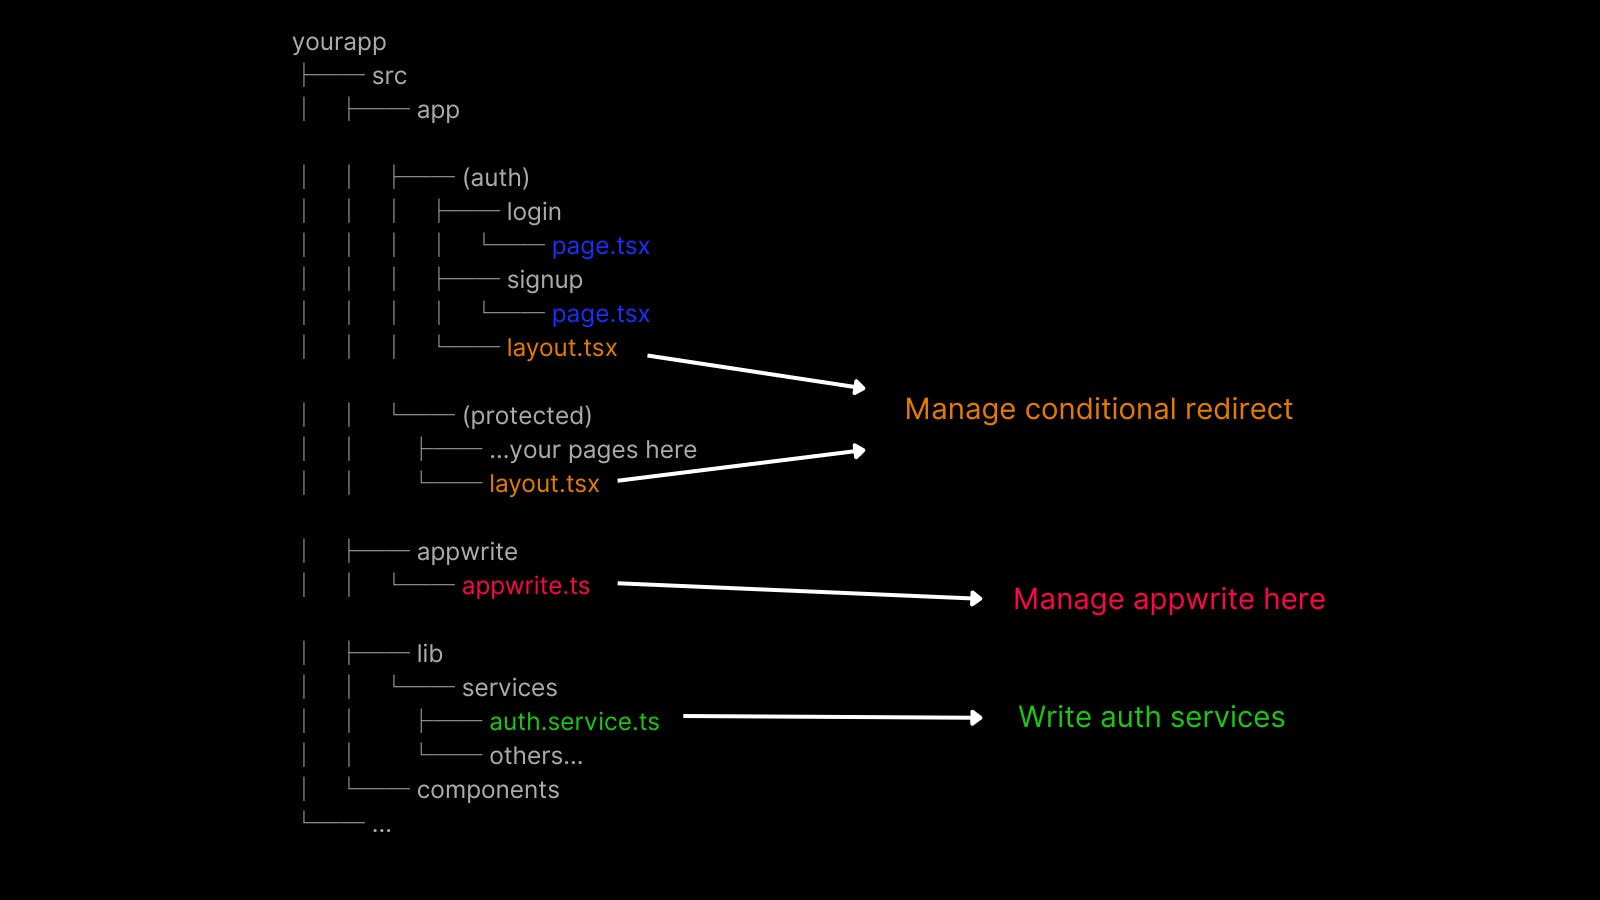
So first of all let's work on the appwrite folder. In your src folder make a new folder called appwrite and make a appwrite.ts file. Here is where we can manage apis to use different services of appwrite including authentication, database, storage and others.
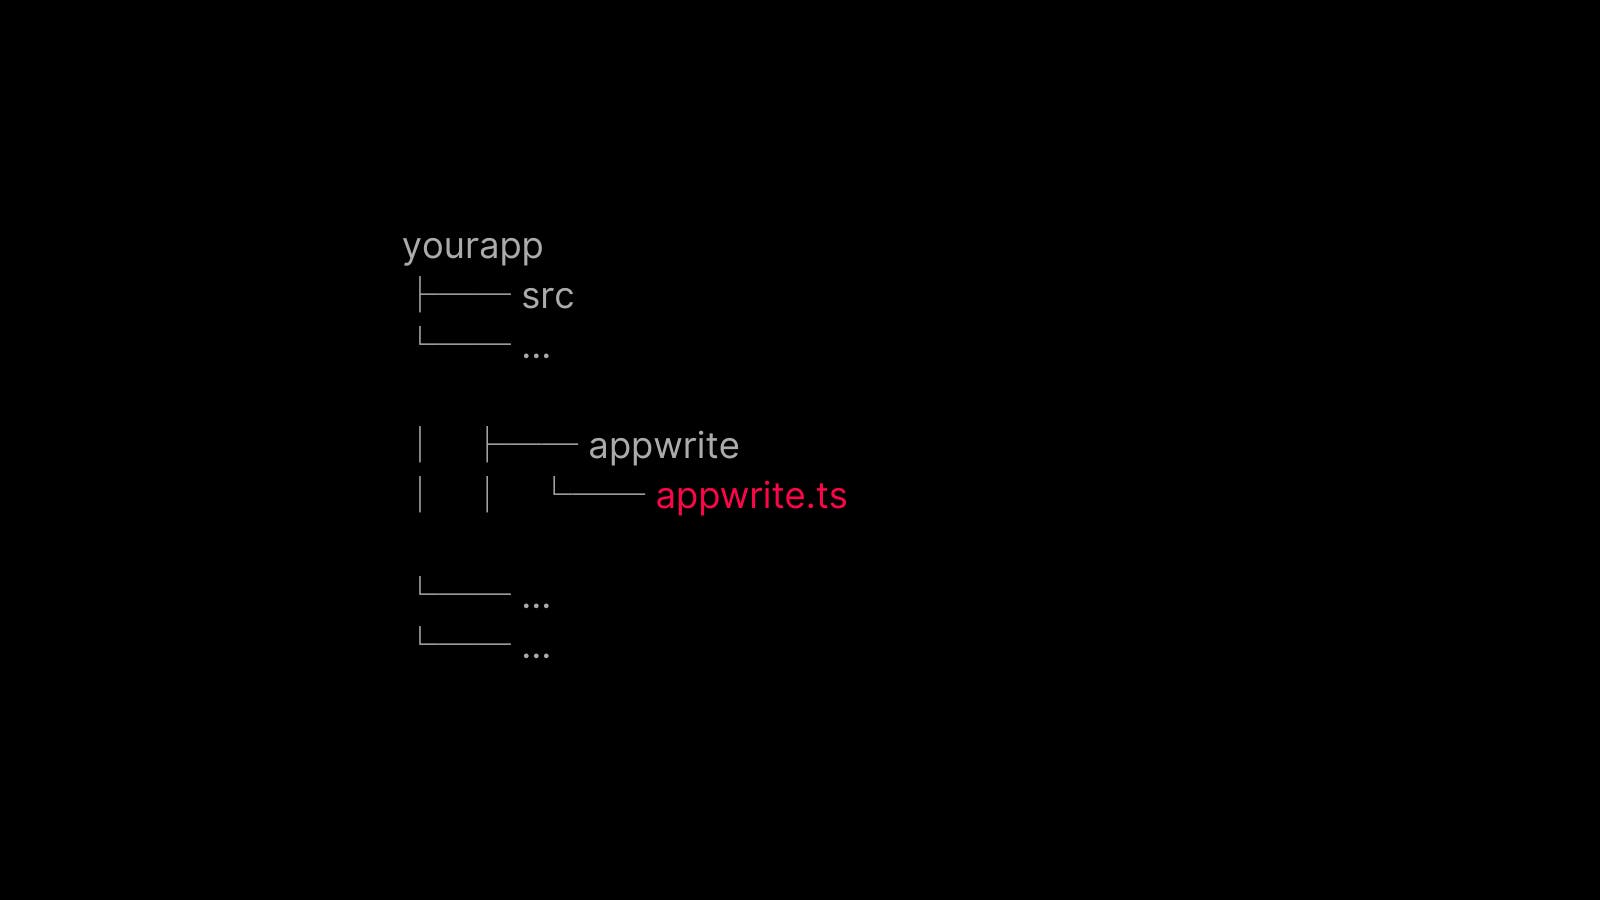
For the sake of this tutorial I'll show just the authentication part for appwrite just to keep things clean. Now in your appwrite.ts file copy and paste this code and let's understand what it's doing.
import { LoginInterface, RegisterInterface } from "@/interfaces/auth.interface";
import { Account, Client as Appwrite, ID } from "appwrite";

let api: any = {
  sdk: null,

  provider: () => {
    if (api.sdk) {
      return api.sdk;
    }
    let appwrite = new Appwrite();
    appwrite
      .setEndpoint("https://cloud.appwrite.io/v1")
      .setProject("************");
    const account = new Account(appwrite);

    api.sdk = { account };
    return api.sdk;
  },

  createAccount: (registerBody: RegisterInterface) => {
    return api
      .provider()
      .account.create(
        ID.unique(),
        registerBody.email,
        registerBody.password,
        registerBody.fullName
      );
  },

  getAccount: () => {
    let account = api.provider().account;
    return account.get();
  },

  createSession: (loginBody: LoginInterface) => {
    return api
      .provider()
      .account.createEmailSession(loginBody.email, loginBody.password);
  },

  deleteCurrentSession: () => {
    return api.provider().account.deleteSession("current");
  },
};

export default api;
In this code, we create an api object where we instantiate Appwrite using new Appwrite() and connect it to our project using appwrite.setEndpoint("https://cloud.appwrite.io/v1").setProject("************").setProject("************")). You will obtain the project ID from your Appwrite account.
Next, we utilize new Account(appwrite) to access the authentication APIs provided by Appwrite.
After that, we define different functions for user registration, login, and authentication checking. These functions will be used to create services that can be efficiently utilized in our application.
Working with the services folder
Now that we defined different functions for auth in the
appwrite.tsfile it's time to gather all our services in one place! Create a new folder with the nameliband inside that createservicesfolder. Here create aauth.service.tsfile. Here we'll write our auth services in one place so it's easy for us to manage.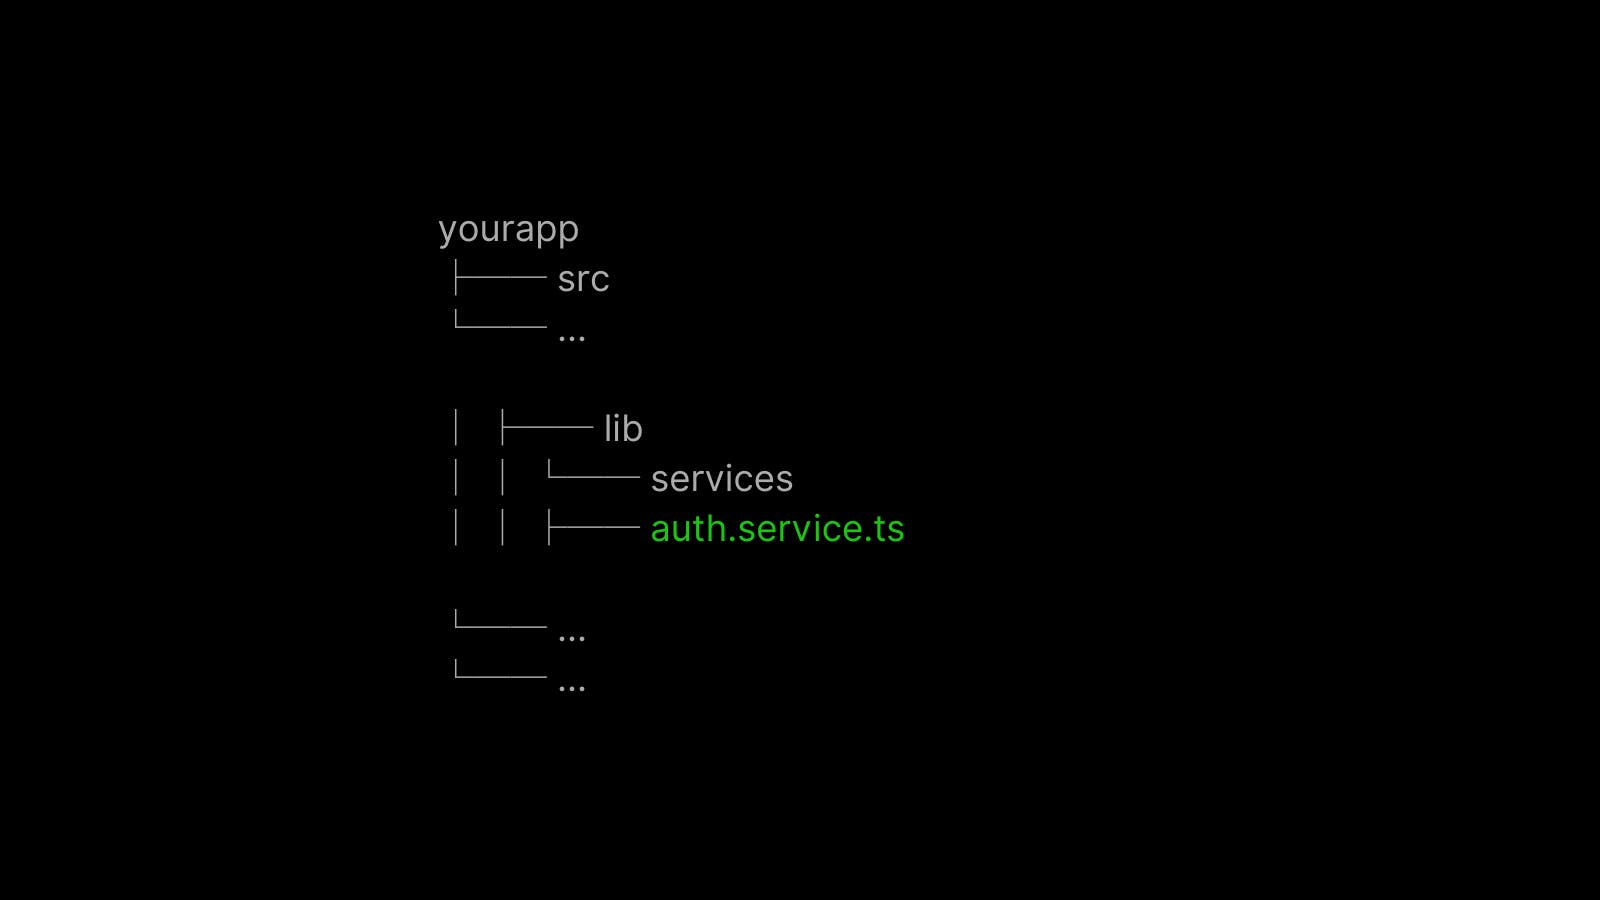
Now that you created let's copy and paste these code in
auth.service.tsfile.
import api from "@/appwrite/appwrite";
import { LoginInterface, RegisterInterface } from "@/interfaces/auth.interface";

export const register = async (registerBody: RegisterInterface) => {
  try {
    const user = await api.createAccount(registerBody);
  } catch (error) {
    console.error("Error occurred during registration:", error);
    throw error;
  }
};

export const login = async (loginBody: LoginInterface) => {
  try {
    const session = await api.createSession(loginBody);
    if (session) {
      const account = await api.getAccount();
      return account;
    }
  } catch (error) {
    console.error("Error occurred during login:", error);
    throw error;
  }
};

export const getSession = async () => {
  try {
    const account = await api.getAccount();
    return account;
  } catch (error) {
    console.error("Error occurred during getSession:", error);
  }
};
In this file we created three services. One for register , one for login and one for cheking session (getSession). Notice that we used the functions that we already wrote in the appwrite.ts file.
Login and Signup
Now that we have services set up, create your
loginandsignupfolder inside the the(auth)group route. It will allow us to wrap our auth pages with a layout where we will check if the user is authenticated or not. If he is authenticated in this case we will redirect him to the main page of the app. Which will look in shortly.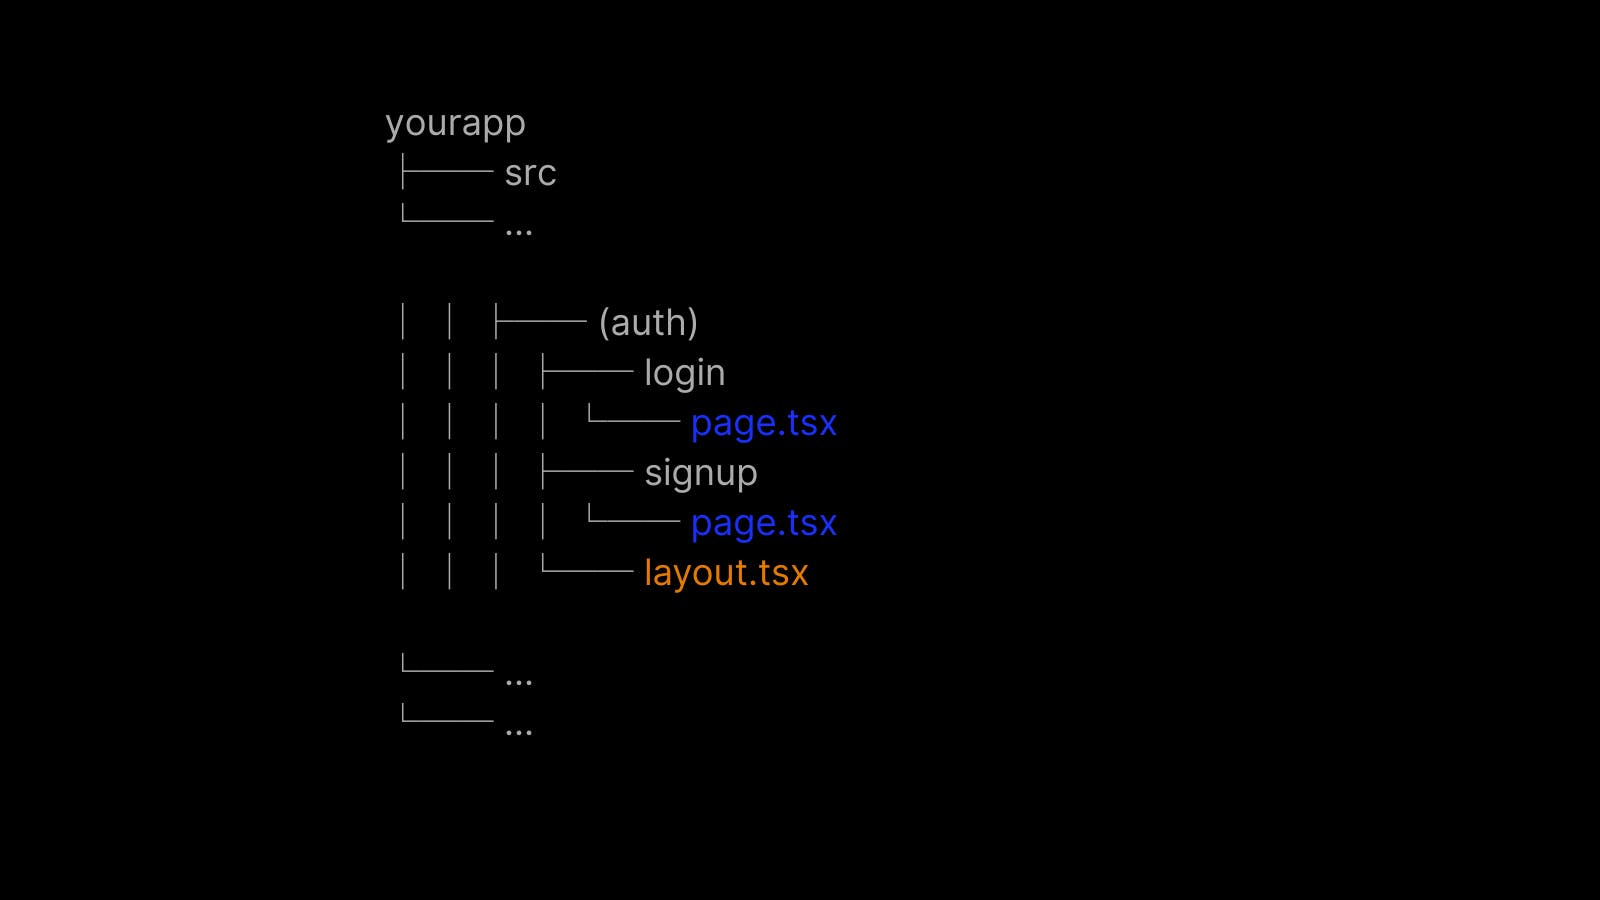
On both pages write as usual forms and use the
loginandregisterservices exported fromauth.service.ts. Now that have we created the login and register pages, it is now time to validate the user and implement the security of protected routes.Protect private routes 🔒🔒
Now comes the final part of protecting our private routes. In order to protect your routes. Wrap your routes inside a group like
(protected)and add pages inside that group. But why we added this group? We added this to check users' session in thelayout.tsxfile of this group and perform our actions for the unauthenticated user, in our case redirecting him to another page. Here is what it should look like: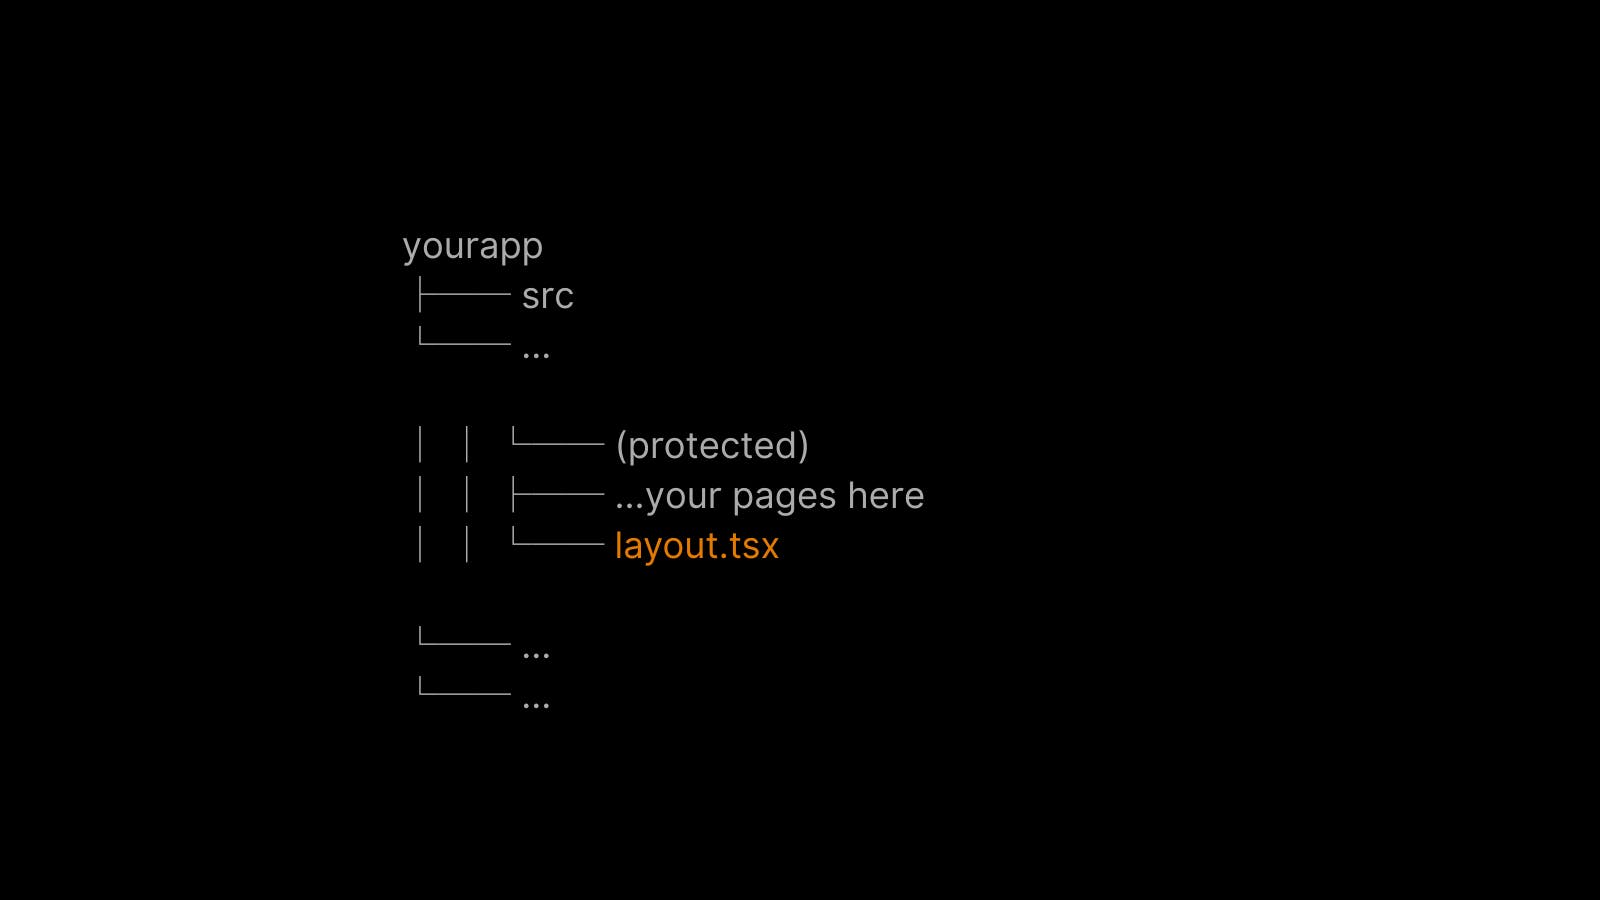
Now let's look at the code of
layout.tsxfile to understand how it works in real. Look at the closely:
"use client";

import Logo from "@/components/Logo";
import { Toaster } from "@/components/ui/toaster";
import { useToast } from "@/components/ui/use-toast";
import { getSession } from "@/lib/services/auth.service";
import { useRouter } from "next/navigation";
import React, { useEffect, useState } from "react";

interface Props {
  children: React.ReactNode;
}

const ProtectedLayout: React.FC<Props> = ({ children }) => {
  const router = useRouter();
  const { toast } = useToast();
  const [loading, setLoading] = useState<boolean>(true);

  useEffect(() => {
    const checkSession = async () => {
      try {
        const session = await getSession();
        if (!session) {
          toast({
            variant: "destructive",
            title: "Session Expired",
          });
          router.push("/login");
          localStorage.clear();
        }
        setLoading(false);
      } catch (error) {
        router.push("/login");
        setLoading(false);
      }
    };

    checkSession();
  }, []);
  return (
    <>
      {loading ? (
        <>
          <main className="w-screen h-screen fixed flex items-center justify-center">
            <Logo className="animate-pulse" />
          </main>
        </>
      ) : (
        <>
          {children}
          <Toaster />
        </>
      )}
    </>
  );
};

export default ProtectedLayout;
Let's break it down together! In order to check users session we will need to use the react client component. But not freak if we create holes for other components to fit in this component with {children} that will allow the any childrens to be server or client components.
Now get back to the main part. We created a loading state to show some user-friendly loader when we are checking the session of user. Next in the useEffect hook we all using the getSession service that we defined in the auth.service.ts file. After checking the session we can do whatever we wish for authenticated and unauthenticated user. In my case, for authenticated user I just set the loading state to false. And for unauthenticated user I performed some actions and redirected him back to the auth page.
Similarly, you can check the user session in the (auth) group and redirect users to dashboard/main page if the user is logged in.
Ad tada~~~!! You are now able to secure you application! 🔥🔥🔒
Learning resources
If you are looking for an example of how to work with Next.js 13 with Appwrite efficiently check out my repository on github. It has some best practices defined. Btw, stars ⭐ are appreciated 😜
The repository: https://github.com/NiazMorshed2007/popwola
Questions?
If we haven't understand any part of it of have confusion feel free to ask in the comments. I'll be happy to help!